Table of Contents
Porcelain tiles are a popular choice for flooring because they’re tough and look great. But accidents happen—whether it’s dropping something heavy or just everyday wear and tear, your tiles can end up chipped. The good news? You don’t always need to replace the whole tile. With a little effort and the right tools, you can fix that chip yourself and save some cash. Let’s walk through how to repair a chipped porcelain floor tile, step by step.
Key Takeaways
- Fixing a chipped porcelain tile yourself is cost-effective and straightforward.
- Using the right tools and materials ensures a smooth and durable repair.
- Addressing chips early prevents further damage and keeps your floor looking its best.
Understanding the Importance of Tile Repair
Preventing Further Damage to Your Floor
When a porcelain tile gets chipped, it’s not just about appearance. That chip can grow into a bigger crack over time, potentially spreading to nearby tiles. Fixing the issue early prevents this domino effect, saving you from more extensive and costly repairs down the line. Plus, moisture can seep into the chip, creating problems like mould or weakening the adhesive underneath the tile. Nobody wants that hassle.
Maintaining the Aesthetic Appeal of Your Home
Let’s face it—chipped tiles are an eyesore. They can make an otherwise beautiful floor look worn and neglected. Repairing them restores the sleek, polished look of your space. If you’re planning to sell your home, addressing these blemishes can even boost your property’s appeal. After all, first impressions matter, and a flawless floor can make a big difference.
Saving Money with DIY Repairs
Hiring professionals can be pricey, but many minor tile repairs are manageable as DIY projects. With basic tools and a bit of patience, you can fix chips yourself without breaking the bank. Plus, learning this skill means you’re prepared for future mishaps. Investing in quality materials, like epoxy and colour-matching kits, ensures long-lasting results at a fraction of the cost.
Essential Tools and Materials for Repairing Porcelain Tiles

Choosing the Right Epoxy and Fillers
When it comes to fixing a chipped porcelain tile, epoxy is your best friend. Look for a high-quality, two-part epoxy that bonds well with porcelain. Some epoxies are even tinted, which can save you time when it comes to matching colours. If your tile has a deeper chip, consider using a filler first to build up the damaged area before applying the epoxy. This ensures a strong and smooth repair.
Selecting Colour Matching Kits
To make the repair seamless, you’ll need a colour matching kit. These kits often include pigments and mixing tools to help you match the repaired area to the surrounding tile. Take your time with this step—precision is key. If you’re unsure, test the colour on a small, inconspicuous spot before applying it to the repair.
Gathering Sandpaper and Polishing Tools
Sanding and polishing are crucial for a professional-looking finish. Stock up on sandpaper in varying grits, starting with coarse (around 120-grit) to smooth out the filler or epoxy, and finishing with fine (400-grit or higher) for a polished surface. A polishing cloth or pad can add that final touch, bringing back the original shine of the tile.
Step-by-Step Process to Repair a Chipped Porcelain Tile
Cleaning and Preparing the Damaged Area
Before diving into the repair, you need to start with a clean slate. Use a damp cloth and a mild detergent to wipe down the chipped tile. This removes dirt, grease, or any loose debris that could mess up your repair. Once cleaned, let the area dry completely. After that, grab some painter’s tape and carefully place it around the chipped spot. This protects the surrounding tiles from accidental damage during the repair process.
Applying Epoxy and Colour Matching
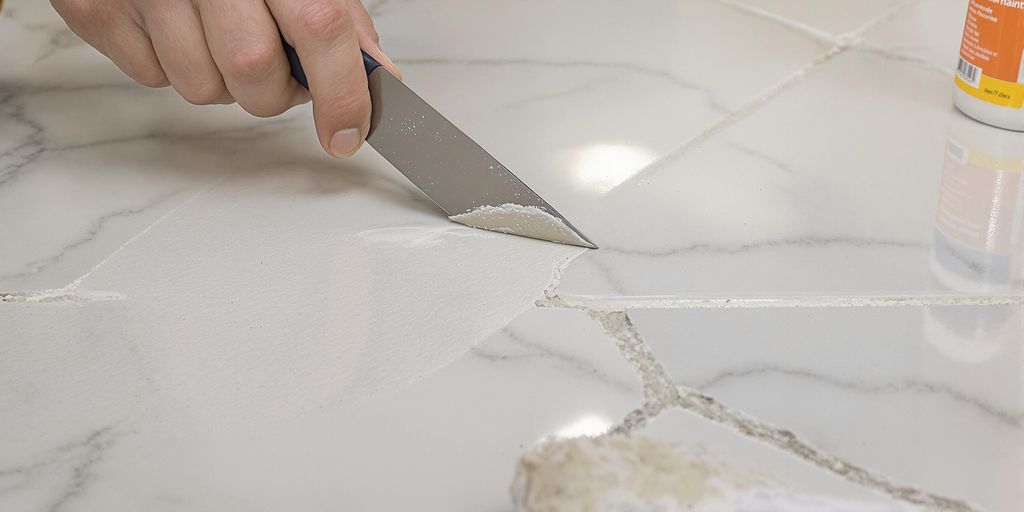
Mix a two-part epoxy adhesive as per the instructions on the package. Using a small applicator, like a toothpick or a putty knife, fill the chipped area with the epoxy. Smooth it out to ensure it’s level with the rest of the tile. Here’s the trick: while the epoxy is still wet, use a tile repair kit to match the colour. These kits often come with pigments you can mix to get the right shade. Apply the colour using a fine brush, blending it with the tile surface for a seamless look.
Sanding, Polishing, and Final Touches
Once the epoxy has fully dried (this might take a few hours, so be patient), it’s time to sand. Use fine-grit sandpaper to gently smooth the repaired area until it’s flush with the rest of the tile. After sanding, polish the surface with a soft cloth to bring back its shine. If needed, apply a thin layer of tile sealant for extra protection and durability.
Taking your time with each step ensures a repair that not only looks good but also lasts for years.
By following these steps, you can restore your chipped porcelain tile to its former glory without breaking the bank.
Tips for Long-Lasting Tile Repairs

Avoiding Common Repair Mistakes
When repairing tiles, it’s easy to make small errors that can lead to bigger problems later. Here’s what to watch out for:
- Rushing the process: Always follow the recommended drying and curing times for adhesives, epoxy, or paint. Skipping these steps can cause the repair to fail prematurely.
- Overloading with materials: Using too much epoxy or grout can result in a lumpy finish that’s hard to smooth out.
- Ignoring proper tools: A good set of tools, like fine-grit sandpaper and a quality putty knife, can make all the difference.
Maintaining Repaired Tiles Over Time
Once your tile is repaired, keeping it in good shape is straightforward but important. Here’s how:
- Clean the repaired area gently with a damp cloth—avoid harsh chemicals that could degrade the repair.
- Check for cracks or chips regularly, especially in high-traffic areas.
- Use rugs or mats in busy zones to reduce wear and tear.
A well-maintained tile repair can last years, saving you from costly replacements.
When to Seek Professional Help
Sometimes, DIY isn’t enough. If the damage is extensive, like multiple large cracks or structural issues, it’s best to call in a professional. They have the expertise to handle complex repairs and ensure a seamless finish. For example, when replacing kitchen benchtops, understanding the costs and materials involved can help you decide whether to DIY or hire an expert.
To keep your tile repairs looking great for a long time, follow these simple tips. First, make sure to clean the tiles regularly to prevent dirt build-up. Use a gentle cleaner that won’t harm the surface. Second, avoid using heavy furniture on newly repaired tiles, as this can cause damage. Lastly, if you notice any cracks or chips, fix them right away to stop them from getting worse. For more helpful advice and to see our services, visit our website today!
Conclusion
So there you have it—fixing a chipped porcelain floor tile isn’t as intimidating as it might seem at first. With a bit of patience and the right tools, you can tackle the repair yourself and save a fair bit of cash. Plus, it’s pretty satisfying to see the results of your own handiwork. Just remember to take your time, follow the steps, and don’t rush the drying process. Whether it’s a small chip or a bigger crack, a little effort goes a long way in keeping your floors looking sharp and tidy. Give it a go—you might surprise yourself!
Frequently Asked Questions
Yes, you can repair a chipped porcelain tile yourself with the right tools and materials. Follow a step-by-step guide to clean, fill, and polish the damaged area for a seamless finish.
You'll need items like epoxy adhesive, a colour-matching kit, sandpaper, a putty knife, and a soft cloth. These tools help ensure a smooth and professional-looking repair.
If the damage is extensive or you’re unsure about the repair process, it’s best to seek help from a professional. They can ensure a flawless and long-lasting result.
Save Time and Money with Professional Surface Care
Chipped tiles happen, but fixing them quickly keeps your floors looking their best.
At Surface Care, we offer fast, cost-effective tile repairs to restore damaged porcelain without the need for full replacements—saving you time and money.
If DIY isn’t enough, let our experts restore, revive, and renew your surfaces. Get in touch today!

Get Your Free Quote Today!
Ready to transform your surfaces? Whether it’s a minor scratch or a complete restoration, our experts are here to help.
Simply fill out the form below, and we’ll provide you with a free, no-obligation quote tailored to your needs. Experience the quality and care that only Surface Care can offer.
Don’t wait—revive, restore, and renew your surfaces today!
