Table of Contents
Got a chipped ceramic floor tile? Don’t stress—it happens to the best of us. Everyday wear and tear, heavy furniture, or even the occasional dropped item can leave your tiles looking less than perfect. The good news? You don’t have to rip up your entire floor to fix it. With a few tools, some patience, and a little know-how, you can repair those chips and get your tiles looking as good as new. Let’s break it down step by step.
Key Takeaways
- Identify the type of damage on your ceramic tiles before starting any repairs.
- Use the right tools and products, like epoxy or tile repair kits, for the best results.
- Regular maintenance and protective measures can help prevent future tile damage.
Understanding the Causes of Tile Chips
Common Reasons for Ceramic Tile Damage
Ceramic tiles, though tough, aren’t indestructible. Everyday wear and tear is a big culprit. Dropping heavy objects is a common way tiles get chipped. It could be a saucepan in the kitchen or a tool in the garage. Another reason is improper installation. If the tiles aren’t set correctly, they might not have the support they need, making them vulnerable to damage. Lastly, moisture can sneak under tiles, especially in bathrooms or kitchens, leading to weakening and eventual chipping.
How to Identify Different Types of Tile Chips
Not all chips are the same. Some are tiny surface nicks that don’t go deep, while others might expose the layer beneath the tile glaze. Here’s a quick breakdown:
- Surface Chips: Small and often cosmetic, these can sometimes be polished or filled easily.
- Edge Chips: Found on the tile’s edges, usually caused during installation or by shifting furniture.
- Deep Chips: These penetrate the tile’s glaze and can expose the core material, requiring more effort to repair.
The Impact of Heavy Furniture and Foot Traffic
Heavy furniture can be a silent tile killer. Dragging a bulky couch or table across the floor? That’s a recipe for chips. Foot traffic is another sneaky factor. Over time, especially in high-traffic areas like hallways, the constant pressure can wear down tiles. Using rugs or furniture pads can help minimise these risks. Also, note that tiles with a porous clay body are more prone to damage from weight and moisture absorption.
Regular checks for chips or cracks can save you from bigger issues later. Even small chips can grow into larger problems if ignored.
Essential Tools and Materials for Tile Repair

Choosing the Right Tile Repair Kit
When it comes to repairing chipped ceramic tiles, having the right repair kit can make all the difference. Look for kits that include epoxy resin or tile repair adhesive, as these are essential for filling in chips and cracks. Some kits also come with colour-matching paint to help blend the repair with the rest of the tile. Toothpicks or small brushes are often included for precise application. While not every kit is the same, make sure to choose one that suits the type of tiles you have—whether they’re glossy, matte, or textured.
Safety Gear to Use During Repairs
Tile repair might seem straightforward, but it’s important to protect yourself. Always wear protective gloves to shield your hands from sharp edges or harsh chemicals. Safety goggles are a must to keep debris out of your eyes, especially if you’re dealing with broken tiles. A dust mask can also come in handy if you’re sanding or working with grout, as it will prevent you from inhaling fine particles. Safety gear may not seem exciting, but it’s better than dealing with an injury.
Additional Supplies for a Seamless Finish
Aside from your repair kit and safety gear, you’ll need a few extra tools to ensure a clean and professional look. Here’s a quick checklist:
- Grout remover: Useful for clearing out old grout before starting your repair.
- Fine-grit sandpaper: Helps smooth out the repaired area for a polished finish.
- Painter’s tape: Keeps the surrounding tiles protected and ensures clean lines.
- Sponge and water bucket: Essential for cleaning up excess adhesive or grout while you work.
A little preparation goes a long way. Having all your tools and materials ready before starting can save you time and frustration later.
Step-by-Step Guide to Repairing Tile Chips

Preparing the Damaged Area for Repair
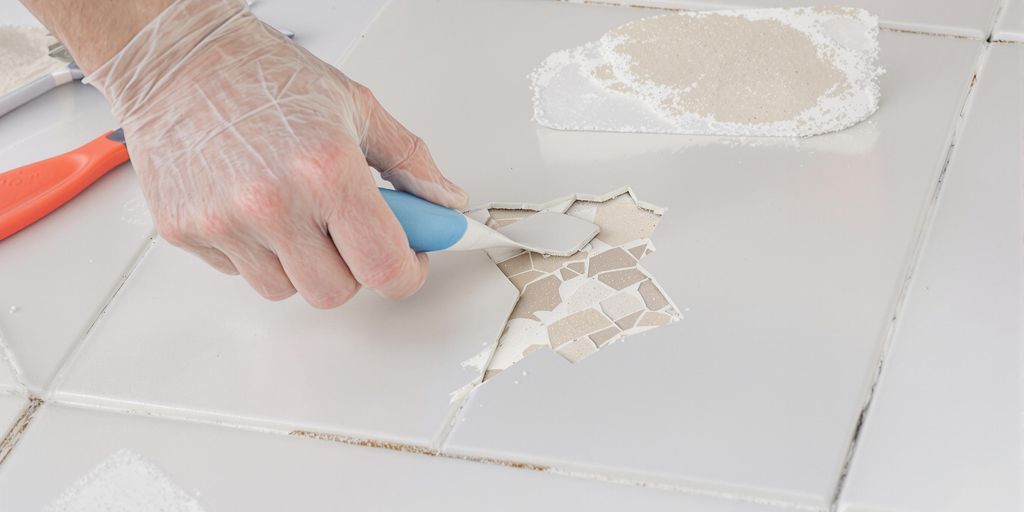
Before diving in, cleaning the damaged area thoroughly is essential. Use a damp cloth to remove any dust, dirt, or loose tile fragments. If adhesive residue is present, carefully scrape it off with a trimming knife. This step ensures that the repair materials adhere properly and results in a smoother finish.
Applying Epoxy or Tile Repair Adhesive
Once the area is prepped, it’s time to fill the chip. Choose an epoxy resin or a tile repair adhesive that matches your tile’s colour. Follow these steps:
- Mix the epoxy or adhesive as per the manufacturer’s instructions.
- Use a toothpick or a small brush to apply the mixture into the chipped area.
- Smooth the surface using a putty knife, ensuring it blends seamlessly with the surrounding tile.
- Allow the adhesive to cure completely. This process can take a few hours to a full day, depending on the product.
Polishing and Sealing the Repaired Tile
After the adhesive has dried, lightly sand the repaired area with fine-grit sandpaper to ensure a smooth and even surface. If needed, apply matching paint to the repaired spot for a flawless look. Finally, seal the area with a tile sealant to protect it from moisture and wear. This step not only enhances durability but also helps maintain the tile’s appearance over time.
Taking your time during each step can make the difference between a noticeable patch and a repair that’s practically invisible.
Preventing Future Tile Damage
Tips for Regular Tile Maintenance
Keeping your tiles in good condition starts with consistent care. Regular inspections are key—check for cracks, chips, or loose tiles every few months. Even small issues can turn into bigger problems if ignored. Clean tiles routinely with a pH-neutral cleaner to avoid damaging the surface. Avoid abrasive scrubbers that might scratch the finish. Also, don’t forget to clean the grout lines; dirty grout can weaken the bond between tiles over time.
Using Protective Measures in High-Traffic Areas
High-traffic areas like hallways or kitchens are more prone to wear and tear. To minimise damage, consider placing rugs or runners in these zones. Use furniture pads under heavy items to prevent scratches or cracks when they’re moved. For homes with pets, trimming their nails can help avoid accidental tile scratches. If you’ve recently addressed plumbing issues, ensure the area is completely dry before reattaching tiles. Expedite drying with fans or dehumidifiers to prevent further damage.
When to Reapply Grout Sealer
Grout sealer is like a protective shield for your tiles. Over time, this barrier wears down, leaving your grout and tiles vulnerable to stains and moisture. Reapply grout sealer every 1-2 years, or sooner if you notice water soaking into the grout instead of beading up. Always start with a clean surface before resealing to ensure the sealer adheres properly. A quick test? Sprinkle a few drops of water on the grout—if it darkens, it’s time to reapply.
To keep your tiles looking great and avoid damage in the future, it’s important to take some simple steps. Regular cleaning and using the right products can help protect your tiles. If you notice any cracks or chips, fix them quickly to prevent bigger problems later. For more tips and to learn about our services, visit our website today!
Wrapping It Up
Fixing chips in ceramic floor tiles might seem like a bit of a hassle at first, but it’s definitely doable with the right approach. Whether you’re patching up small chips or replacing a whole tile, taking the time to do it properly can make a world of difference. Not only will your floors look better, but they’ll also last longer. Plus, there’s something satisfying about knowing you’ve tackled the job yourself. So, grab your tools, follow the steps, and give your tiles the care they deserve. Your floors will thank you for it!
Frequently Asked Questions
To repair a small chip in a ceramic tile, clean the area thoroughly, then use a tile repair kit or epoxy resin to fill the chip. Smooth it out with a putty knife and let it dry completely before polishing.
Yes, you can repair a cracked tile by applying epoxy resin or tile adhesive to the crack. Make sure to clean the area first and smooth out the adhesive for a seamless finish.
To prevent chips, use protective pads under heavy furniture, avoid dropping heavy objects, and regularly inspect and maintain the tiles. Adding rugs in high-traffic areas can also help reduce wear and tear.
Save Time and Money with Professional Surface Care
Chipped ceramic tiles can make your floors look worn, but repairing them quickly keeps them looking their best.
At Surface Care, we offer fast, cost-effective tile repairs, restoring damaged ceramic without the need for full replacements—saving you time and money.
If DIY isn’t enough, let our experts restore, revive, and renew your surfaces. Get in touch today!
Get Your Free Quote Today!
Ready to transform your surfaces? Whether it’s a minor scratch or a complete restoration, our experts are here to help.
Simply fill out the form below, and we’ll provide you with a free, no-obligation quote tailored to your needs. Experience the quality and care that only Surface Care can offer.
Don’t wait—revive, restore, and renew your surfaces today!

